Showing posts with label Bloom Girl Anneli. Show all posts

Friday, July 31, 2015

love and kisses

Hey everyone!!! Sherry here with a look into my creative process!!! And sometimes the unexpected journey it sometimes takes me on. Have you ever been in the process of making a project and half way through you go"crap, I'm not liking how this looks". But, you're to far in to 'fix' it but also to far into it to toss it!!! Well, I started this layout thinking that it would be a 12x12 project. Then, as I was getting going I decided I didn't love it! So, instead of tossing it and starting new I figured out which parts I loved and worked around them!!

So all I want to say is believe in yourself and you talent! Trust the process and love what you create! Sometimes it has to go through a yucky stage before it becomes exactly what you hoped it would be:)

So here it is, flawed start and all!!

Step ONE

I found a nice soft textured patterned paper and pulled out two of my favorite Bloom Girl stamps! i positioned them so that when I started adding color they wouldn't bleed together to much! (You will see what I mean in the next step)
Once the black ink of the stamped images is dry I did a thin layer of clear gesso over the top of the entire layout. This will help in the following steps to prevent the paper from completely absorbing the inks and liquid.

Step TWO

Next up, my FAVORITE way to add fun color to any project, Magicals!! I selected a few shades of pink and a few shade of brown to create fun hair colors! Because I added the layer of clear gesso i could wipe color from where I didn't want it with ease while it was drying! I slowly added more and more layers till the color was what I wanted it to be!!

THEEEEEEEN I decided I HATED IT!!!!! I almost threw it out till my fiance came down, hearing my words of frustration, to see what the fuss was all about! He looked at it and agreed maybe the color combo wasn't right, but that the left side was awsome!!! So BOOM my direction changed and I cut the layout in half and added some fun stencilling with molding paste.

Step THREE

Oh how i love the intensity of a good spray! Once the molding paste was dry i sprayed the left and top edges with water to allow the spray to spread wherever it naturally wanted to flow. I unscrewed the top of the spray bottle and ran the end of the straw along the two edges of the project, then tilted it slightly to allow it to flow around the paste.

Step FOUR

then to soften the colors and brighten it up a bit, I added a bit more stencilling with white paste! (you'll notice in later pics that I actually ended up extending this further up and left then where it is here. Once my picture and a few embellies went down a lot of the paste texture disappeared)

Step FIVE

Next up, EMBELLIES!!!!! I pulled out my bowl of homeless flowers (I have a cute glass bowl on my workspace that I throw homeless items that don't have a package anymore!) and metal embellishments and started layering flowers and metal bits around where I knew I wanted my photo to be set.

Along the edges of the flowers and focal area I spread clear glass beads and allowed to dry completely.

Once the flower were secure and the beads were dry I dry brushed them all with white gesso. (tip: if you like the color of your embellishments and want some of it to show through, you could also use clear gesso. Or for a super fun look you can even use black gesso!)

Once dry I start sprinkling my selected Magicals over the gessoed areas! I continued to layer this till the vibrancy was there! fortunately because magcals are so pigment packed it didn't take to many layers!

Step SIX

All that was left was to pop dot the photo on and ta-da I have a fun 6x12 layout to display!
Here are a few close ups to check out a few more details!


Thank you so much for popping in! Remember, the supplies I used are just ones that I prefer and enjoy. But, if you like something else as home that you love use it, if you have something similar use it! I am always a fan of new goodies but sometimes we can't have it all! So dig into your stash, pull out some delish products and create! You don't have to have the exact things I use to create beautiful things!

Make sure to pop into my Blog, Facebook and Instagram for more inspiration, sneak peeks, tutorials and product reviews!
Thank you for popping in:) make sure to peek around at the other amazing projects by the DT!!

xoxo

Supplies
PRIMA:
Bloom Girl- Summer (#980160)
                     Metal Floral Embellishments (#980221)
                     Flowers (#575212)
Art Ingredients- light paste (#961404)
Flowers(#565251, #556945 and #577957)
Stencil- 'weaving' (#962333)

LINDY'S STAMP GANG
Magicals-(for the hair) Steam punk sepia, sandra dee sepia, steel shimmer
                (for the flowers) cheshire cat cherry, time travel teal and rusty lantern lime
Spray-flying monkey midnight

AMY TANGERINE
'Twins' thickers (#366837)

HEIDI SWAPP
Clear Pocket Cards (#369959)

Thursday, May 7, 2015

Turning Stamps into Art !!!

Hi Bloom fans, Milagros here with you today!  Only a few more days until Sunday when we celebrate Mother's Day.  Today I am sharing a sweet project you can make in time for Mother's Day, believe me it takes barely a couple of hours with stunning results, thanks to Jamie's awesome stamps!
Inspired in my mom's garden which gets visited by hummingbirds on a daily basis here's my project
 
You will need
Catrina, Mother and Anneli Stamps
I am sharing the full images just so it's easier for you to picture where I got my images from


Start by priming your canvas, I always begin with a coat of gesso
Stamp and roughly cut your images
Adhere them to your place of choosing with gel medium

now you are ready for some paint!
I am using Liquitex acrylic paints in different shades of blue and white

For my hummingbirds I chose a mix of watercolor pencils, acrylic and mica powders

For my roses I chose a couple of different reds and white to create depth and richness in my flowers

here's a closer look at my canvas

 
the hummingbirds sparkle with the gold, green and blue mica powders, just as they do in nature.
I hope you have enjoyed my project, that it has brought some last minute inspiration for your Mother's Day gifts.
 
Enjoy this weekend with Mom!
 
Milagros
 
Supplies used
Catrina, Anneli and Mother stamps
canvas, paint and brushes
gel medium, gesso
Art Ingredients: mica powders in gold, green and blue


Tuesday, April 7, 2015

1 Paper, 1 Stamp Set and 3 Different cards!

Hi there Blooming Friends!

It's Mindy here and today I have a few cards to share with you. 
I took 1 piece of paper, and one stamp set and made 3 very different cards! The stamp set I used is 'Bloom Girl Anneli'. I wanted to show you all that you can use just certian elements from the stamps to create different looks. This lets you really get the most out of these gorgeous images. 

A lot of paper companies are producing those 12x12 sheets and one side is all different journaling cards. Well this is from Prima's Coffee Break Collection. All I did was cut up a few of my favorite Journaling Cards.


I stamped Anneli's Face in the corner of the largest piece. Then used the lined part of the journaling card to stamp the bird and sentiment. 


I then added some scraps of paper from the same collection and I also took some Bloom Girl Element Chipboard pieces, misc tags and some Prima Flowers and added them to my cards. I also used lots of 3d foam dots!


There you have it. 1 paper, 1 stamp set and 3 super fun cards! I hope you enjoyed my project. 
Don't forget to visit soon for another stunning project from one of my amazing Bloom Girl Sisahs!

Supplies

980153 - Bloom- ChipBoard Pieces


578446 - Cafe Mocha Flowers

Coffee Break Paper Collection

980276 - Bloom Girl Anneli Stamp

980108 - Bloom Brads 

Thursday, February 12, 2015

Bloom Girls and Copics!


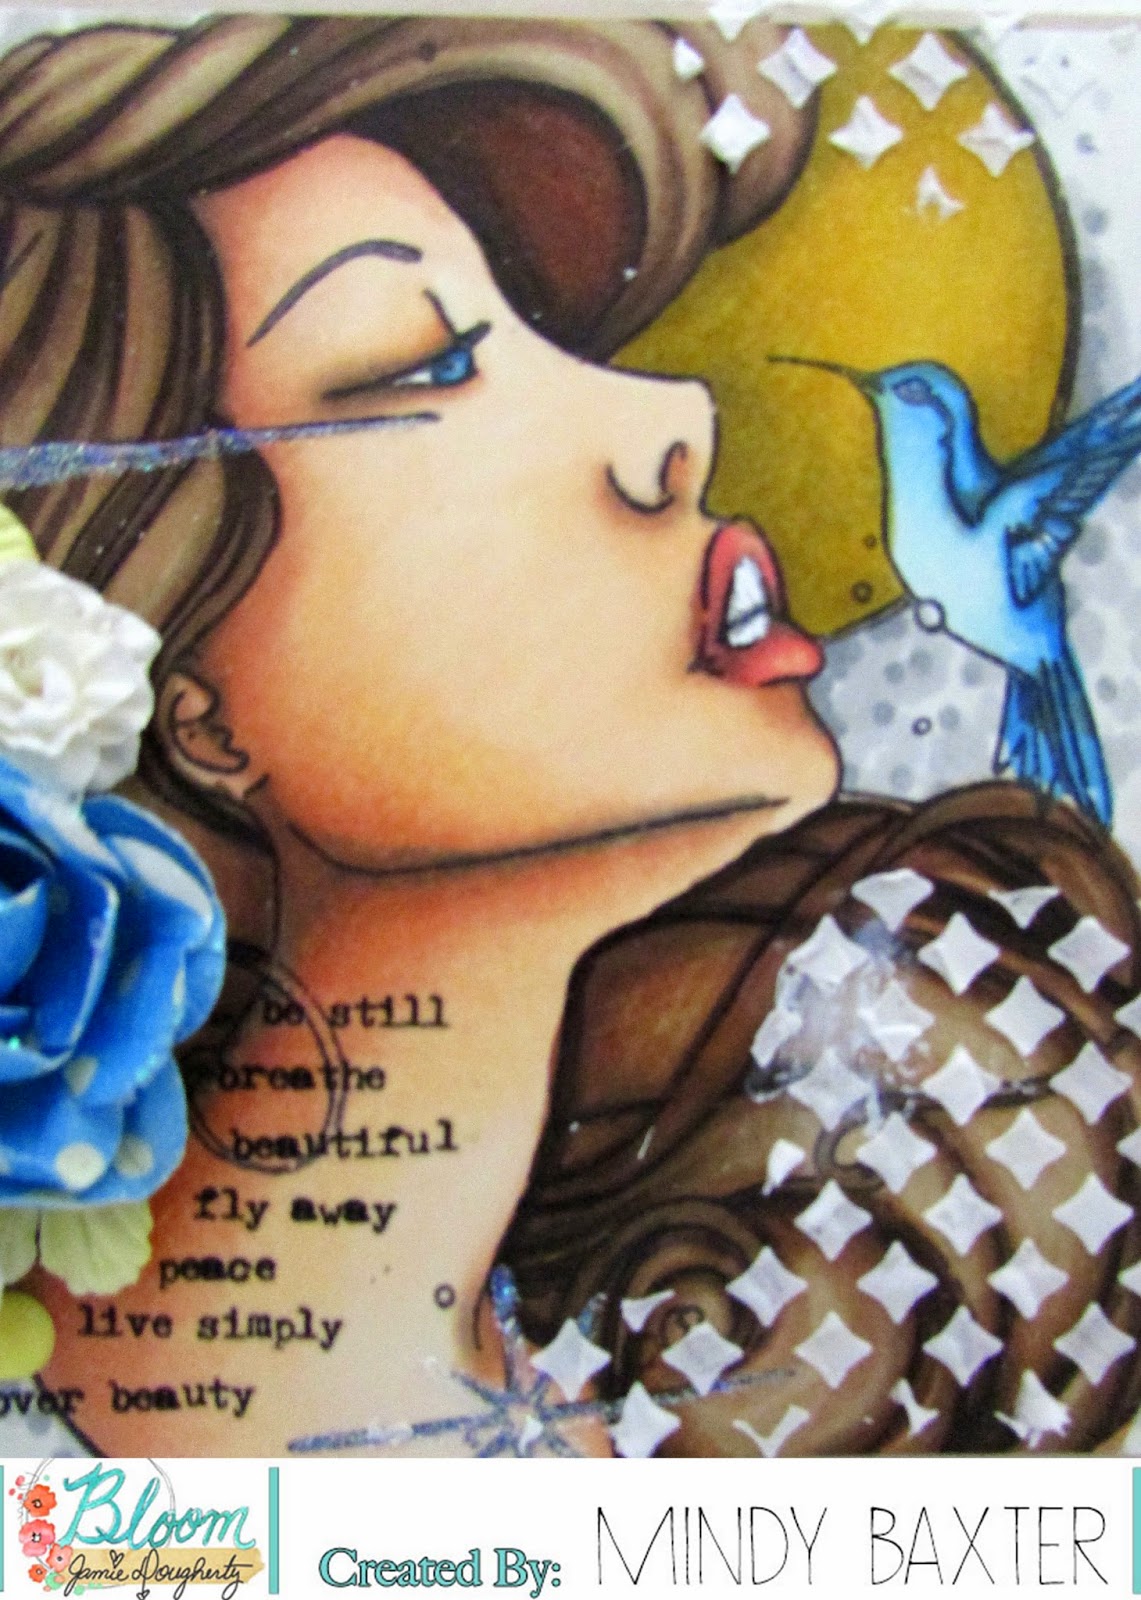
Hi there my crafty friends! It's Mindy here today and I have a card to share with you. I have colored this gorgeous NEW Bloom Girl image using Copic markers. This stamp was just released at CHA last month and it's just stunning. You are able to get so many details coloring in these images.

Here's a video of me coloring in the entire image. I wasn't sure exactly what I was going to do with this image at the time I colored it so I wanted to color the entire face and hair.


Once I was finished coloring the image I had decided to make a card using my image. I trimmed the image down fitting it on a 5 1/2 x 5 1/2 card base. I used my Bloom Girl Water Color paper pad for my card base, it's sturdy and I love the textured look behind my image.


Since my image pretty much takes up my entire card I have decided to keep the layers minimal, I always use 3d foam dots to pop up my images and layers. It gives so much more to the cards and any project, really. I added some twine behind my matted image, rub ons along the side of her neck and some random Prima flowers from my stash. Then I thought it would be a nice touch to add some molding paste using my NEW Bloom Girl Stencil 'Spark'.


Bloom Girl Spark Stencil - 980399
Bloom Girl Stamp Annelli - 980276
Bloom Girl Water Color Paper Pad - 980269