Showing posts with label prima watercolor pencils. Show all posts

Tuesday, July 28, 2015

Watercoloured Free Spirit on Canvas

Good morning everyone!

DT Stephanie with you today to show you a bit of watercolouring on a canvas that I created with Bloom Girl Free Spirit and a couple of awesome products from Jamie's line at Prima.


List of supplies I used :
12x12 canvas
6x12 Stencil-Phrases, 655350980436
1 Color Bloom Spray (colour of your choice)
1.5" Thread Letters-LOVE, 655350980474
A4 Watercolor Paper Pad, 655350980269
Bloom - Cling Stamps - "Free Spirit", 655350980184
Sentiment from the Bloom Cling Stamp - Quentin, 655350980337
Bloom- Art Book,  655350980009
Large Doily
StazOn black ink
Watercolour pencils (Prima's and Inktense by Derwent)
Waterbrush pen
Two kraft tags
Brown ink for distressing
Coral Gelato stick from Faber-Castell
Tiny square stencil
Gel medium
Modeling Paste
Twine


Here are the steps to complete this project :

Start by putting a thick layer of modeling paste on your preferred word from the phrases stencil and some tiny squares, too.


Remove stencil and let dry complete. You can do this project over a couple of days, or you can use a heat gun to fasten the process.


Spray some Color Bloom here and there, moving the canvas to try having droplets. 


Remove two pages from your Art Book and gently tear them in large pieces. Stick the first pattern on your canvas by using gel medium.


Add your doily in the center, again glueing it with gel medium.


Ink both kraft tags and put on top of the doily. We're building layers!


Add thread letters wherever you want. If the letters try to move when handling the canvas, add a thin coat of gel medium to their back.


Stamp sentiment on two pieces.


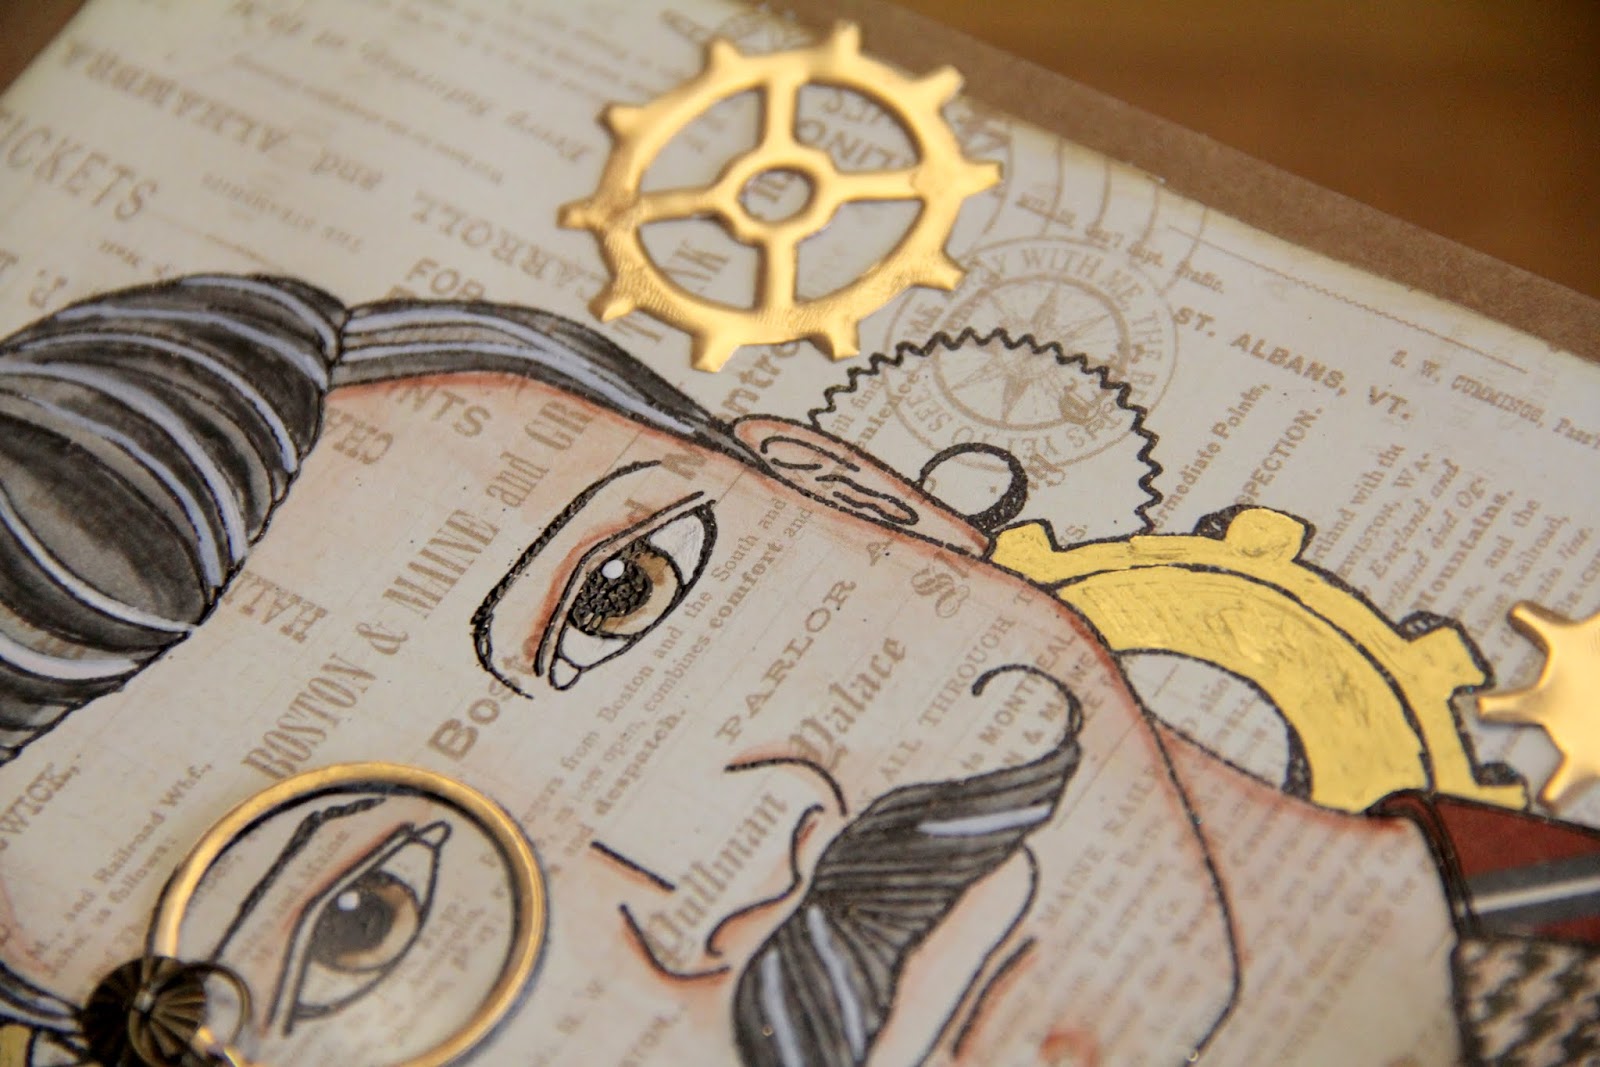
Stamp your Bloom Girl on watercolour paper.


Start adding colours to her face first, by using Prima's hair and skin set. You can easily do the rest with your Inktense pencils or any medium you like, as long as she gets completely coloured,


Add some twine as a hairband, if you want.


Take the second page out of your Art Book, tear it, glue it on top of the rest.


Spray some Color Bloom again.


Place your Bloom Girl on the layers using either double-sided tape or 3D foam dots.


For a nice finishing touch, grab your gelato and rub some colour at the corners of the canvas.


Here's the look without the sentiment on.


A close-up...


And our finished piece!


I hope you liked this canvas, as it was totally out of my comfort zone. How about YOU do something different the next time you create, too? :-)

Thursday, July 9, 2015

Explore, ATC's Bloom style!

Hi everybody!  Here in Puerto Rico the summer is on full blast, the sun is shinning and actually a bit of rain wouldn't hurt to cool ourselves!  Inspired in this warm weather I decided to take my Bloom girl out for a walk!
Let's start our journey!  Bring out Jamie's fab watercolor pad, that thing is really thirsty!!!!
measure and cut to 2.5" x 3.5" for your ATC's
Stamp your girl using Archival ink, this will get really wet!

Next add some modeling paste to the Circles stencil, behind your girl!
I'm using Faber Castell whipped spackle

Start adding your gelatos to create the blazing sun

the fun part coloring your girl!

using Glass Bead Glitter Gel adhere some micro beads for a finishing touch

Now you have a quick army of ATC ready to share among friends!


I filmed a short video on making them
Thanks for visiting and have fun Exploring!


Bloom stamp (explore, create, Inspire)
Bloom Circle stencil
Bloom A4 watercolor pad
Gelatos (lemon, cherry, squeezed orange)
Whipped spackle
Glass Bead Glitter gel
Watercolor pencils
Micro beads (Fire Opal)


Thursday, June 4, 2015

Quentin, a book for Father's Day

Hi everyone, Milagros today with you! It's June and it's the month when we celebrate Dad's, who better to help us than adorable Quentin?  For today's project I used a Folio by Tim Holtz and some hoarded papers by Graphic 45, vintage "A Proper Gentleman".  Of course you are welcome to go through your stash and find something masculine to help you build your man!
come on in

Let's get started

 As you can see I stamped the bow and collar in 2 different pattern papers, to create a contrast, then fuzzy cut
 I wanted to use a real chain over Jamie's drawing so here's my solution, a TH brad, ready for the actual chain
 I cut a circle of plastic, out of packaging for my lens, a metal rim for the glass that I then gold leafed
 I used 111 Prima watercolor pencil for the eyes
 they were inspired by my DH...


 All of that is pretty explanatory, cut and paste!
 I cut some gears in metal and used a gold leaf pen to highlight his gears, the bow was popped
 I used a Faber Castell Big Brush in White for the hair and mustache
 love the way he glows!
After I though I was done, I wasn't so I decided to use a stencil to add some texture

 yup, he needed that!
 and of course he got dusted with some Mica powder in Gold!!!
I hope he inspires and helps you in this upcoming Father's Day!

Milagros

Quentin stamp
chipboard album
Dies and die cutting machine
metal, chain, brads


Thursday, May 21, 2015

Wall Clock with Milagros

Hi Bloom fans Milagros here with you! It is always an exciting week when we get to showcase the awesome Bloom Girls products in several forums at the same time.  Have you visited the Prima blog this week? The girls are showcasing the 6x12 stencils, awesome stuff I tell you! You can also find a wall clock I created on their Instagram feed @primamarketinginc or @milagroscrivera !


But since you are here let me break it down for you!
Paint a wood blank wood round in white.  I am using a 14" Walnut Hollow blank
After the paint dries give it a coat of clear gesso the width of the stencil.
Once the gesso dries you are ready to have fun with the Prima watercolor pencils
 who doesn't love a rainbow? My daughter organizes my cardstock in that order, my paint, everything! And she is the inspiration behind this piece, a fun and bright home décor piece!


Now take a look at a sophisticated version done by my 12 year old student Camila.  She was inspired by a LO I had done back in January .  Here I am thinking bright fun colors for my students and here they are producing adult versions, LOL!!! Enjoy, she used Bloom Sprays and the mask with 3D Gloos gel to resist the design!


Enjoy your piece and remember to have fun!
 
Milagros
 
Supplies needed
 
Bloom Ricket stencil
Clear Gesso
White Paint
Prima Watercolor Pencils
Prima Watercolor brush